
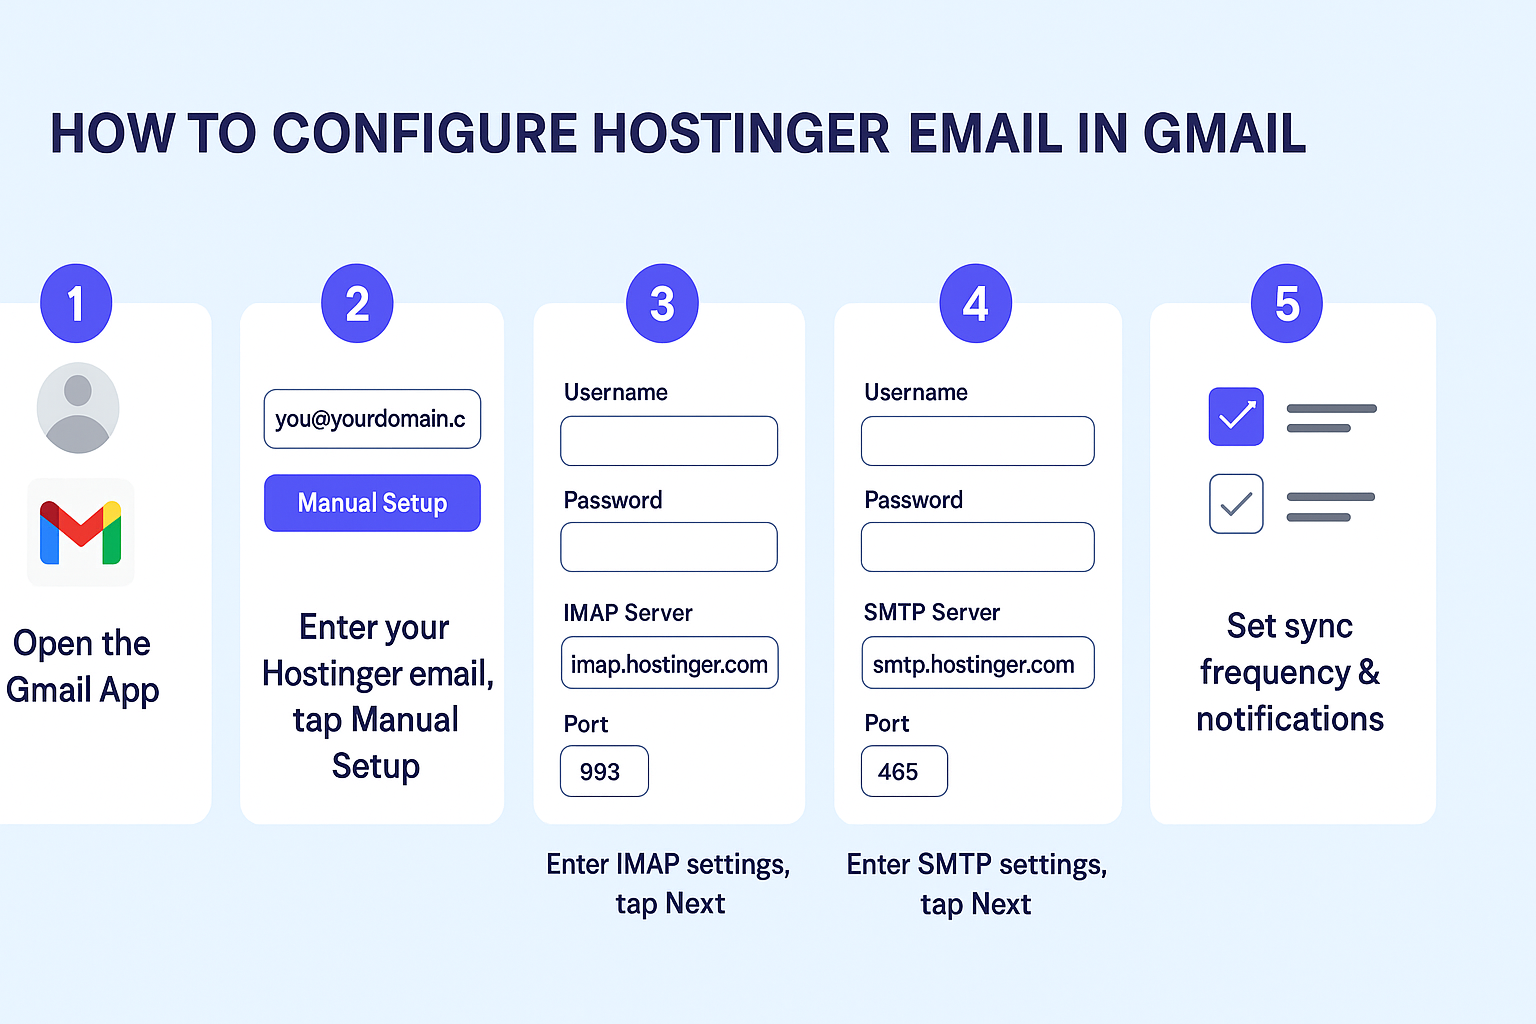
Here’s how to configure your Hostinger email to Gmail app (so you can send/receive Hostinger emails from your Gmail app):
✉️ Step 1: Get your Hostinger Email Settings
First, note these settings:
- IMAP Server:
imap.hostinger.com - IMAP Port:
993 - Security: SSL/TLS
- SMTP Server:
smtp.hostinger.com - SMTP Port:
465 - Security: SSL/TLS
- Username: Your full email ( like
you@yourdomain.com) - Password: Your email password
📱 Step 2: Add Hostinger Email to Gmail App
- Open your Gmail app on your mobile.
- Tap your profile icon (top-right corner).
- Tap Add another account.
- Select Other (not Google, not Outlook, etc.).
- Enter your full Hostinger email address (example:
info@yourdomain.com), then tap Manual Setup. - Choose IMAP.
🔧 Step 3: Enter Incoming Mail Settings (IMAP)
- Username: (your full email address)
- Password: (your Hostinger email password)
- Server:
imap.hostinger.com - Port:
993 - Security Type: SSL/TLS
Tap Next.
🚀 Step 4: Enter Outgoing Mail Settings (SMTP)
- SMTP Server:
smtp.hostinger.com - Port:
465 - Security Type: SSL/TLS
- Username: (your full email address)
- Password: (your Hostinger email password)
Tap Next.
✅ Step 5: Final Settings
- Set sync frequency as you like (ex: every 15 minutes).
- Enable notifications if you want.
- Tap Done.

That’s it! 🎉 Now your Hostinger email will work perfectly inside your Gmail app


One Response
I have been absent for some time, but now I remember why I used to love this site. Thanks , I’ll try and check back more frequently. How frequently you update your website?